Disclaimer: FlipperForce does not provide tax, legal, or accounting advice. This report and FAQ are for informational purposes only and should not be soley relied upon for tax compliance. Because IRS rules are complex and subject to change, we strongly recommend consulting with a qualified tax professional or accountant before making business decisions or filing returns.
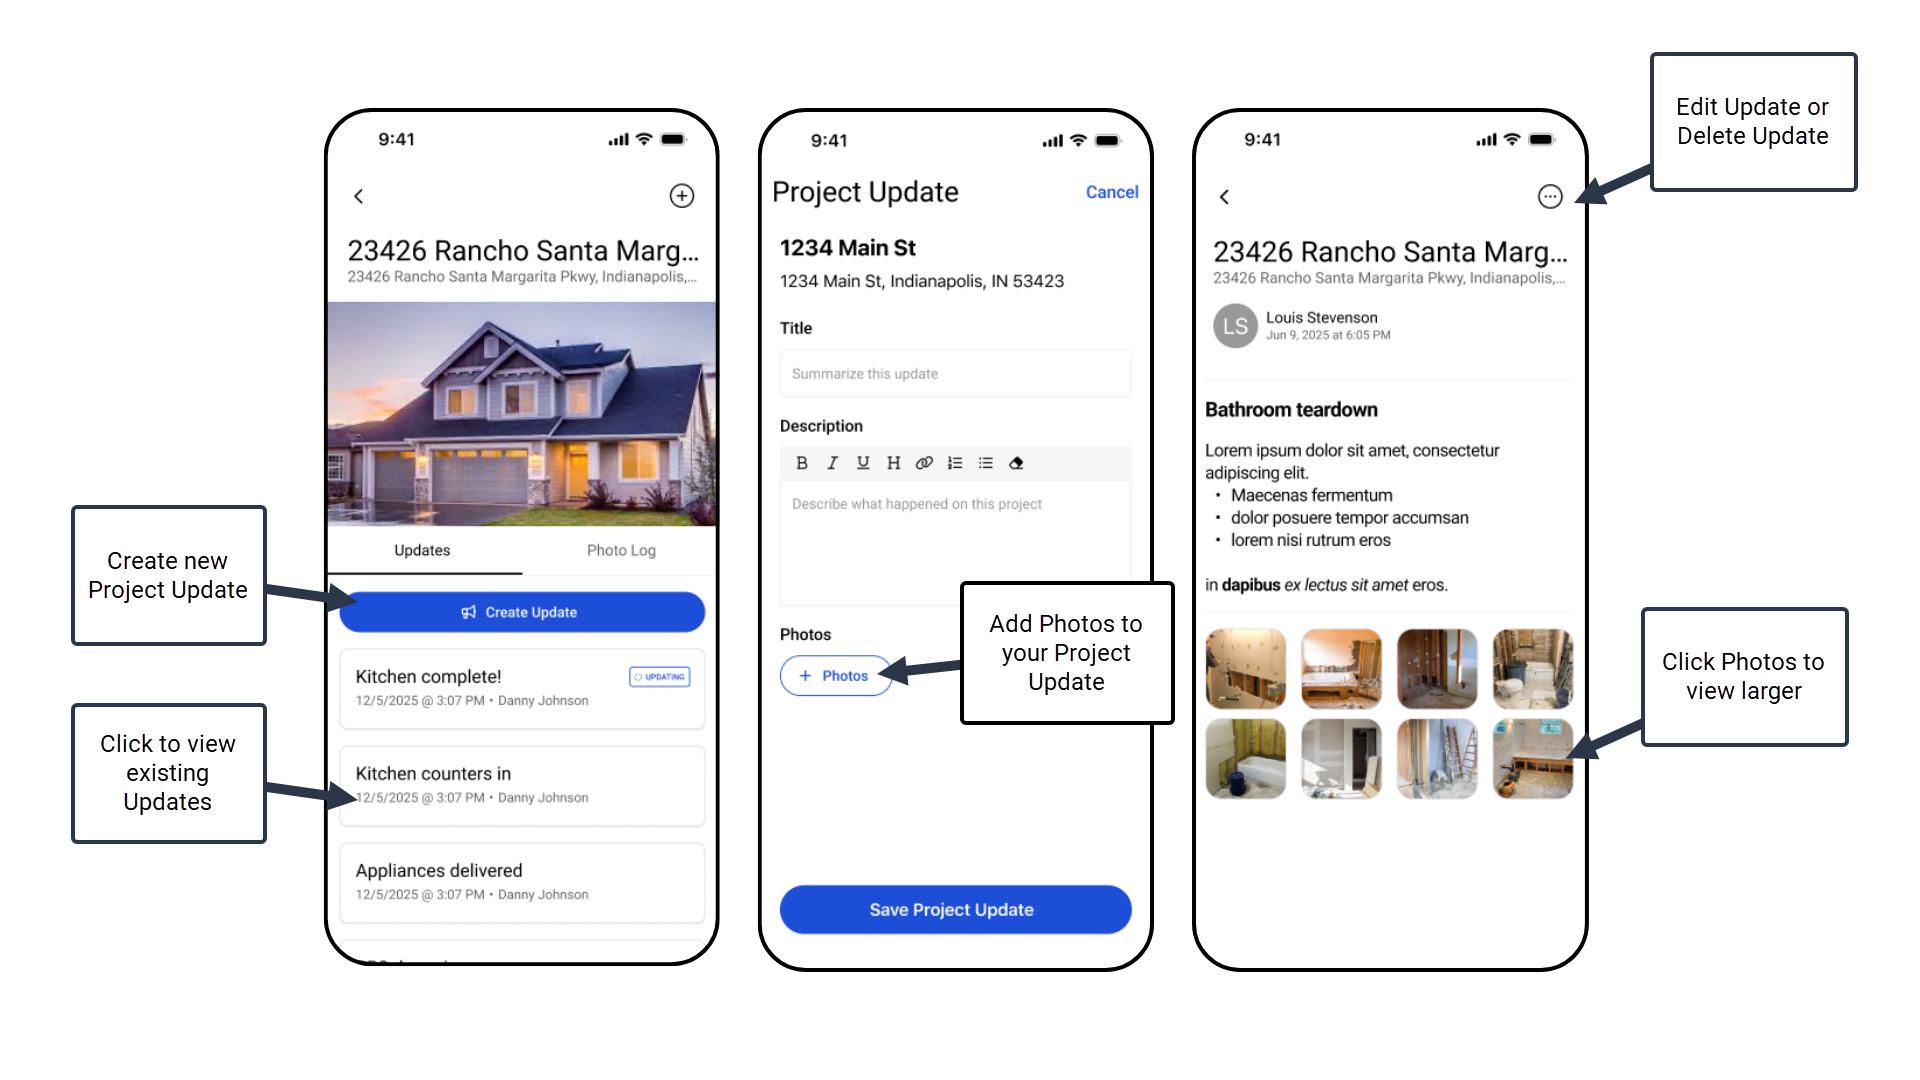
Creating a new project update is simple. Follow these steps:
Navigate to the Project: From your main dashboard, tap on the specific project you want to update.
Access the Update Form:
Look for a "Post Project Update" button on the project's main screen, or
Tap the small plus sign (+) icon usually located in the upper right corner of the project screen, then select "Post Project Update" from the dropdown menu.
Enter Your Update Details:
Title: Type a concise title for your update in the designated "Title" field.
Description: Enter your detailed message in the "Description" field. You can manually type your update, or for longer messages, use your phone's native voice-to-text (dictation) feature.
To use Voice-to-Text: Tap into the "Description" field to bring up your keyboard. Look for the microphone icon on your keyboard (its exact location varies slightly by phone model and keyboard app, but it's usually near the spacebar or a symbol key). Tap the microphone icon and begin speaking clearly. Your words will automatically convert to text. Tap the microphone icon again when you're finished.
Add Photos (Optional): To include visual context with your update:
Tap the "Add Photos" icon (often a camera or image gallery icon).
You'll then be given options to:
Take New Photo: Use your device's camera to snap a new picture.
Choose from Library: Select existing photos from your phone's photo gallery.
Add from Photo Log: Pick photos that have already been uploaded to this project's Photo Log in FlipperForce.
Select the photos you wish to attach.
Post Your Update: Once your title, description, and any photos are ready, tap the "Post Update" button (or similar) to publish your update.